mistakes to avoid
What are the most common grading errors that only show up in the largest sizes?
Proportional scaling breaks down as sizes increase. Armscye depth, dart intake, ease distribution and notch alignment are where extended size ranges most often fail on a real body.
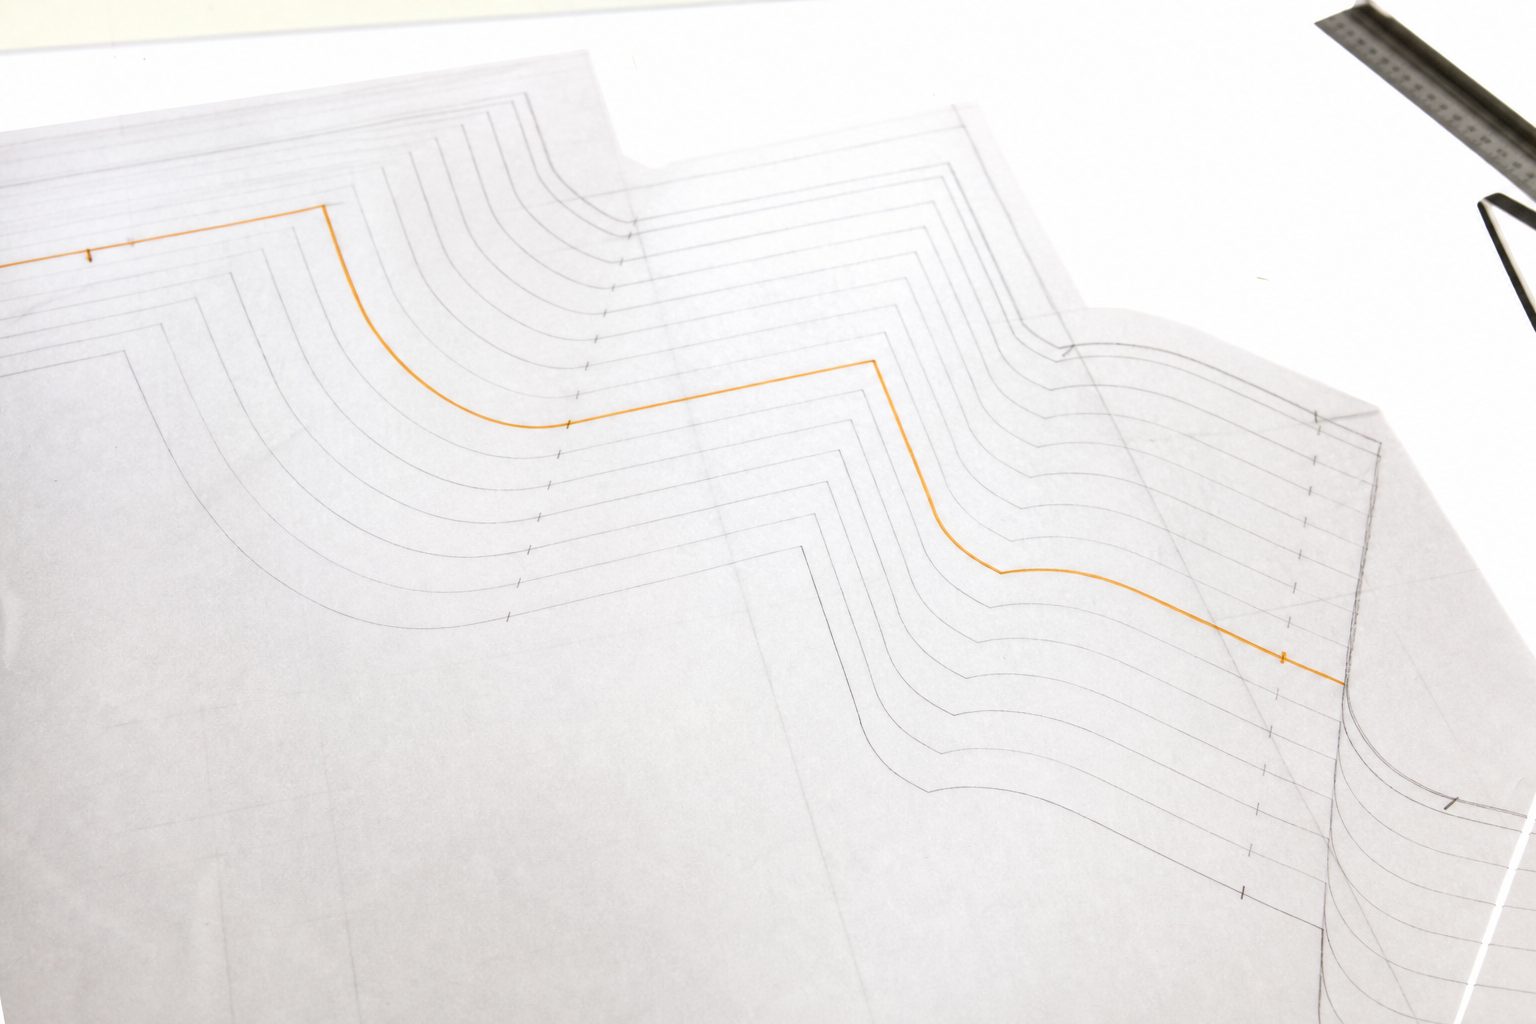
The errors that surface only at the top of a size range almost all come from one root cause: a grade rule that adds circumference to a body without changing anything else about it. Width grows, depth does not. So the armscye stays shallow while the bicep grows, the dart intake stays modest while the bust projection grows, and the shoulder slope stays at the angle you drafted for a size 8.
The garment then fails in predictable places. Binding across the underarm. A dart that points at nothing. Wearing ease that has quietly turned into three inches of extra fabric at the waist. Notches that no longer meet because two seam lines grew at different rates.
Below are the specific failure modes, what causes each one, and how to catch them before a tester does.
Why straight proportional grading fails past a certain point
A grade rule is a set of increments: add so much at the side seam, so much at the shoulder, so much at the armscye depth, per size. Applied to a narrow range around the base size, uniform increments work well, because bodies within a few sizes of each other really are close to scaled versions of one another.
Extend that same rule across ten or twelve sizes and the assumption stops holding. Bodies do not enlarge uniformly. Circumference at the bust, waist and hip increases faster than vertical measurements like shoulder to bust point or nape to waist. Soft tissue distributes to the torso front and the upper arm more than to the neck or the shoulder point.
The practical response is not to abandon grade rules. It is to break the range into blocks, with a different rule set per block, and to redraft rather than grade for the curves that carry the most fit responsibility: armscye, dart, shoulder.
Keep reading: Do I have to collect sales tax on a PDF pattern sold to a buyer in another state?
Armscye depth and bicep circumference as a paired problem
This is the single most common complaint in extended sizes, and it is almost always misdiagnosed as a sleeve problem.
Here is the mechanism. As you grade up, the bicep gets larger, so the sleeve needs more width. Sleeve width comes from sleeve cap height and cap width, and cap width has to match the armscye it sews into. If the armscye depth increases only slightly per size, the armhole circumference stays small, the sleeve cap must stay narrow to match, and the wearer ends up with a sleeve that binds at the bicep and an underarm that sits too high.
A check you can run on any nested file
For each size, measure and record four numbers: armhole circumference walked along the stitch line, front armscye depth from shoulder point to underarm, sleeve cap height, and sleeve width at the bicep line.
Then look at the increments between adjacent sizes. If armhole circumference is growing by, say, a quarter inch per size while your size chart says bust is growing by two inches per size, the ratio is drifting. In a range where bust increments widen in the upper sizes, from two inches per size to three, the armhole increment usually needs to widen too.
Check the ease independently. Take the sleeve width at the bicep line, subtract the bicep measurement your size chart claims for that size, and confirm that the resulting ease stays roughly constant across the whole range. If it shrinks from three inches at the smallest size to an inch and a quarter at the largest, you have found your binding.
Dart intake, apex placement and where the fullness has to go
Dart intake is the difference between the bust circumference and the underbust circumference, converted into a wedge. As sizes increase, that difference typically increases as well, which means the dart has to get larger. A grade rule that scales the dart legs by a fixed small amount will not keep up.
Two things then break at once. The intake is too small, so the front hangs with drag lines from the bust toward the side seam. And the apex, the point the dart aims at, does not move outward and downward fast enough, so the shaping arrives in the wrong place even when the amount is right.
Where the extra fullness goes is a design decision you must make consciously. A single side bust dart of very large intake creates a sharp point and a long dart leg that is hard to press. The usual answers are to split it into two smaller darts, to rotate part of it into a waist dart or a shoulder dart, or to convert some of it to gathers or a princess seam. Choosing to leave it as one enormous dart is a choice, and it should be a deliberate one.
Keep reading: How did one designer fix a sizing error after two thousand people already bought the pattern?
Ease: keeping wearing ease constant while circumference changes
Wearing ease is the difference between the finished garment measurement and the body measurement. Design ease is the additional amount you added for the look. Both should be intentional, and only one of them should change across the range.
The error is grading finished measurements as a fixed percentage of the body. Two percent of a 34 inch bust is 0.68 inches. Two percent of a 54 inch bust is 1.08 inches. The larger size now has 40 percent more ease at the same nominal proportion, and it reads as a looser, sloppier garment.
Work in inches, not percentages. Decide the wearing ease at the bust, waist and hip in absolute terms, hold it constant across every size unless you have a specific reason, and let the finished measurements fall out of body plus ease.
| Size | Body bust | Intended ease | Finished bust | Ease if graded at 6 percent |
|---|---|---|---|---|
| Small | 34" | 2" | 36" | 2.04" |
| Mid | 44" | 2" | 46" | 2.64" |
| Large | 54" | 2" | 56" | 3.24" |
The percentage column is not obviously wrong on paper. It is very obviously wrong on a body, where an extra inch and a quarter at the bust turns a fitted shell into something that gapes at the armhole. These figures are illustrative, chosen to make the arithmetic visible.
Notch drift and seam length mismatch across nested sizes
Every seam that joins two pieces has to be walked in every size, not just the base. When two adjoining edges grade under different rules, or when one edge is a curve and its partner is a straight line, the lengths diverge as you move away from the base size.
The failure looks like this in testing: at the base size the side seam matches perfectly, at three sizes up the front is a quarter inch longer than the back, and at six sizes up it is five eighths of an inch longer, which is enough to throw the hem out of level.
Notches drift by the same mechanism. If you place notches at the base size and then let the grading software carry them, they move with the piece but not necessarily to the same relative position along a curve that changed shape. A sleeve cap notch that sat at the balance point on a size 10 can sit measurably off it on a size 26.
The remedy is mechanical and unglamorous. Walk every seam in the smallest size, the largest size, and at least two sizes in between. Record the walked length of each edge pair in a table. Any pair that differs by more than an eighth of an inch gets fixed before the file is exported, and any notch you moved gets rechecked in every size, not just the one you were looking at.
See how StitchPattern handles this for independent sewing and knitting pattern design
Neckline and shoulder slope changes that grading rules miss
Necks do not grow in proportion to busts. A grade rule that widens the neckline by a consistent amount per size will, by the top of a wide range, produce a neckline that falls off the shoulders and gapes at the front. Grade the neck width and depth by a much smaller increment than the body circumference, and check the actual neckline circumference at your largest size against a plausible neck measurement plus the ease that neckline style needs.
Shoulder slope is the other quiet one. Slope tends to become slightly more horizontal in larger sizes because of upper body soft tissue, and a pattern that holds one slope angle across the whole range will produce diagonal drag lines from the neck toward the armhole in the upper sizes. Shoulder length also does not grow at the rate the side seam does.
Both are cases where the right move is to draft the extreme size independently from measurements, then compare it against what your grade rule produced. The difference between those two lines is your correction.
Testing the extremes first instead of grading from the middle
The standard workflow is to perfect a base size in the middle of the range and grade outward. It is efficient, and it hides every problem described above until the largest size is on a real body.
Invert it. Draft your base size, then immediately draft the largest size independently from that size's measurements, before you grade anything. Compare the two drafts. The places where the independent draft disagrees with what a linear grade would have produced are exactly your rule change points: armscye depth, dart intake, neck width, shoulder slope.
Then grade between the two anchored sizes rather than outward from one. Sew a muslin at the top size first, not last. And when you recruit testers, weight the cohort toward the top three sizes, because the middle of your range is the part least likely to tell you anything you do not already know.
Turning corrections into a released fix
Grading problems have a specific afterlife: they are usually found by a tester or a customer, they affect a particular piece in a particular subset of sizes, and the fix changes a printed pattern piece. That means a new file and a real obligation to tell the people who already bought the old one which sizes were affected and what changed.
StitchPattern is built to carry that from report to release: log each correction against the piece and the sizes it touches, resolve it into a version, and push the errata to every previous buyer so nobody is cutting into good fabric with last month's armscye.